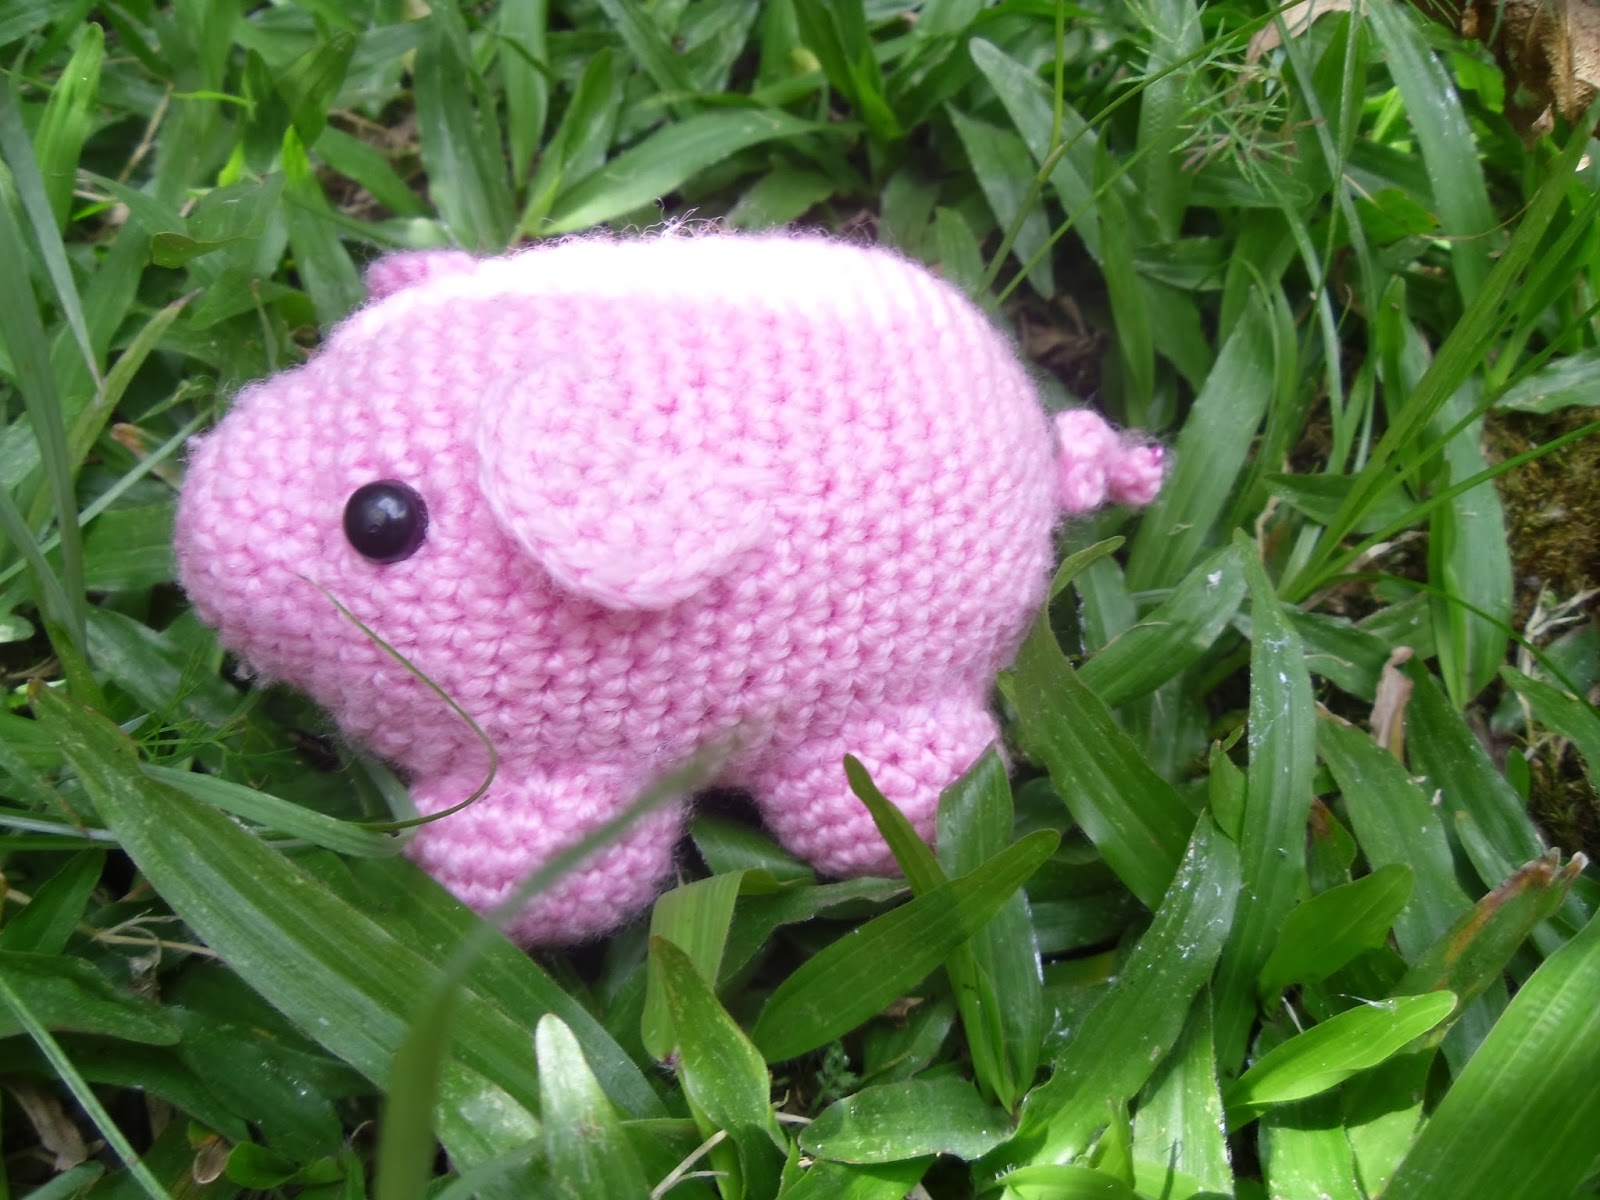
Pig Crochet Pattern

What you will need
Wool-Pink
2x 6mm Black safety eyes
Stuffing
Black embrodery thread
Optional
Pink Wire
This pattern is worked in continuous rounds so I recommend using a stitch marker. Don't worry if you don't have one though, I just use a bobbie pin!
Wool-Pink
2x 6mm Black safety eyes
Stuffing
Black embrodery thread
Optional
Pink Wire
This pattern is worked in continuous rounds so I recommend using a stitch marker. Don't worry if you don't have one though, I just use a bobbie pin!
Body
Rnd 1 ~ 6 sc in a magic ring
Rnd 2 ~ 2 sc in each sc around (12)
Rnd 3 ~ *sc 1 , 2sc in next st * repeat 6 times (18)
Rnd 4-6~ sc 18
Rnd 4-6~ sc 18
Rnd 7 ~ *sc 2 , 2 sc in next st * repeat 6 times (24)
Rnd 8~ * sc 3 , 2 sc in next st * repeat 6 times (30)
Rnd 9 ~ *sc 4 , 2 sc in next st * repeat 6 times (36)
Rnd 10~ *sc 5, 2sc in next st* repeat 6 times (42)
At this point you should place eyes and sew the face onto the Pig
Rnd 11-25~sc 42
You can do more rows of sc if you want a longer pig but I wanted mine to be small and cute.
Rnd 26~ *sc 5, dec 1* repeat 6 times
Rnd 27~ *sc 4, dec 1* repeat 6 times
Rnd 28~ *sc 3, dec 1* repeat 6 times
Rnd 29~ *sc 2, dec 1* repeat 6 times
Rnd 30~ *sc 1, dec 1* repeat 6 times
I decided to stuff my pig now
Rnd 31~ * dec 1* repeat 6 times
Fasten off and weave in any loose ends
Legs (Make 4 of these)
Rnd 4-6~ sc 18
Rnd 9 ~ *sc 4 , 2 sc in next st * repeat 6 times (36)
Rnd 10~ *sc 5, 2sc in next st* repeat 6 times (42)
At this point you should place eyes and sew the face onto the Pig
Rnd 11-25~sc 42
You can do more rows of sc if you want a longer pig but I wanted mine to be small and cute.
Rnd 26~ *sc 5, dec 1* repeat 6 times
Rnd 27~ *sc 4, dec 1* repeat 6 times
Rnd 28~ *sc 3, dec 1* repeat 6 times
Rnd 29~ *sc 2, dec 1* repeat 6 times
Rnd 30~ *sc 1, dec 1* repeat 6 times
I decided to stuff my pig now
Rnd 31~ * dec 1* repeat 6 times
Fasten off and weave in any loose ends
Legs (Make 4 of these)
Rnd 1 ~ 6 sc in a magic ring
Rnd 2 ~ 2 sc in each sc around (12)
Rnd 3 ~ *sc 1 , 2sc in next st * repeat 6 times (18)Rnd 4-6~ sc 18
Fasten off and make sure to leave a long tail so that you can secure it onto the pig later
Ears (Make 2 of these)
Rnd 1 ~ 3 sc in a magic ring, ch 1 and turn
Rnd 2 ~ 2sc in each sc, ch 1 and turn (6)
Rnd 3 ~ *sc 1 , 2sc in next st * repeat 3 times (18)
Fasten off and make sure to leave a long tail so that you can secure the ears onto the pig later
Tail
There are many ways to make a tail. You could just do a chain stich and have a long floppy tail but I wanted my pig's tail to be a little different...
I used pink wire so that my pig could have a curly tail. This step is optional but I thought I would include it anyway
Ok so what you do is measure out a length of wire( how ever long you like) and get your pink wool. Then I just did a chain stich that was just a little longer than my wire. I weaved the wire though the chain stich and then did a round on sc on top of the chains. This took a lot of patience so don't stress if it doen't work out 1st time you try. To attach the tail to the pig just use the remaining tail from the chain stich to tie a knot. I also looped the wire around the pig's body to make sure it stayed. To assure that the crochet doesn't slip off the wire, curve the end. To get the perfect curl in your tail loop the wire around a pencil.
Assembly
This is pretty simple. Attach the legs onto the pig using a yarn needle and thread on the underside of the pig. Then just secure the ears just above the eyes using the same technique.
I hope you enjoyed this pattern and feel free to ask for any patterns that you would like in the future!
If you need any help or have any concerns
(Or if you just want to tell us something) make sure to leave a comment
below. Have fun!
~Chicky 1
~Chicky 1